Android - 媒体播放器
Android 提供了许多方法来控制音频/视频文件和流的播放。 其中一种方法是通过一个名为 MediaPlayer 的类。
Android 正在提供 MediaPlayer 类来访问内置的媒体播放器服务,例如播放音频、视频等。 为了使用 MediaPlayer,我们必须调用这个类的静态方法 create()。 此方法返回 MediaPlayer 类的实例。 它的语法如下 −
MediaPlayer mediaPlayer = MediaPlayer.create(this, R.raw.song);
第二个参数是您要播放的歌曲的名称。 您必须在项目下创建一个名为 raw 的新文件夹并将音乐文件放入其中。
创建 Mediaplayer 对象后,您可以调用一些方法来启动或停止音乐。 下面列出了这些方法。
mediaPlayer.start();
mediaPlayer.pause();
在调用 start() 方法时,音乐将从头开始播放。 如果在 pause() 方法之后再次调用此方法,则音乐将从它离开的地方开始播放,而不是从头开始播放。
为了从头开始播放音乐,您必须调用 reset() 方法。 它的语法如下。
mediaPlayer.reset();
除了 start 和 pause 方法外,该类还提供了其他方法来更好地处理音频/视频文件。 下面列出了这些方法 −
| 序号 | 方法 & 描述 |
|---|---|
| 1 |
isPlaying() 此方法仅返回 true/false 指示歌曲是否正在播放 |
| 2 |
seekTo(position) 此方法需要一个整数,并将歌曲移动到该特定位置毫秒 |
| 3 |
getCurrentPosition() 此方法以毫秒为单位返回歌曲的当前位置 |
| 4 |
getDuration() 此方法以毫秒为单位返回歌曲的总时长 |
| 5 |
reset() 此方法重置媒体播放器 |
| 6 |
release() 此方法释放附加到 MediaPlayer 对象的任何资源 |
| 7 |
setVolume(float leftVolume, float rightVolume) 此方法设置此播放器的上下音量 |
| 8 |
setDataSource(FileDescriptor fd) 该方法设置音视频文件的数据源 |
| 9 |
selectTrack(int index) 此方法采用整数,并从该特定索引的列表中选择轨道 |
| 10 |
getTrackInfo() 该方法返回一个轨道信息数组 |
示例
这是一个演示使用 MediaPlayer 类的示例。 它创建了一个基本的媒体播放器,允许您前进、后退、播放和暂停歌曲。
要试验此示例,您需要在实际设备上运行它以听到音频声音。
| 步骤 | 描述 |
|---|---|
| 1 | 您将使用 Android Studio IDE 在 com.example.sairamkrishna.myapplication 包下创建一个 Android 应用程序。 |
| 2 | 修改 src/MainActivity.java 文件添加 MediaPlayer 代码。 |
| 3 | 修改 res/layout/activity_main 以添加相应的 XML 组件 |
| 4 | 在 MediaPlayer 下创建一个名为 raw 的新文件夹,并在其中放置一个名为 song.mp3 的 mp3 音乐文件 |
| 5 | 运行应用程序并选择一个正在运行的 android 设备并在其上安装应用程序并验证结果 |
以下是修改后的主活动文件src/MainActivity.java的内容。
package com.example.sairamkrishna.myapplication;

import android.app.Activity;
import android.media.MediaPlayer;
import android.os.Bundle;
import android.os.Handler;
import android.view.View;

import android.widget.Button;
import android.widget.ImageView;
import android.widget.SeekBar;
import android.widget.TextView;
import android.widget.Toast;
import java.util.concurrent.TimeUnit;

public class MainActivity extends Activity {
   private Button b1,b2,b3,b4;
   private ImageView iv;
   private MediaPlayer mediaPlayer;

   private double startTime = 0;
   private double finalTime = 0;

   private Handler myHandler = new Handler();;
   private int forwardTime = 5000;
   private int backwardTime = 5000;
   private SeekBar seekbar;
   private TextView tx1,tx2,tx3;

   public static int oneTimeOnly = 0;
   @Override
   protected void onCreate(Bundle savedInstanceState) {
      super.onCreate(savedInstanceState);
      setContentView(R.layout.activity_main);

      b1 = (Button) findViewById(R.id.button);
      b2 = (Button) findViewById(R.id.button2);
      b3 = (Button)findViewById(R.id.button3);
      b4 = (Button)findViewById(R.id.button4);
      iv = (ImageView)findViewById(R.id.imageView);

      tx1 = (TextView)findViewById(R.id.textView2);
      tx2 = (TextView)findViewById(R.id.textView3);
      tx3 = (TextView)findViewById(R.id.textView4);
      tx3.setText("Song.mp3");

      mediaPlayer = MediaPlayer.create(this, R.raw.song);
      seekbar = (SeekBar)findViewById(R.id.seekBar);
      seekbar.setClickable(false);
      b2.setEnabled(false);

      b3.setOnClickListener(new View.OnClickListener() {
         @Override
         public void onClick(View v) {
            Toast.makeText(getApplicationContext(), "Playing
               sound",Toast.LENGTH_SHORT).show();
            mediaPlayer.start();

            finalTime = mediaPlayer.getDuration();
            startTime = mediaPlayer.getCurrentPosition();

            if (oneTimeOnly == 0) {
               seekbar.setMax((int) finalTime);
               oneTimeOnly = 1;
            }

            tx2.setText(String.format("%d min, %d sec",
               TimeUnit.MILLISECONDS.toMinutes((long) finalTime),
               TimeUnit.MILLISECONDS.toSeconds((long) finalTime) -
               TimeUnit.MINUTES.toSeconds(TimeUnit.MILLISECONDS.toMinutes((long)
                  finalTime)))
            );

            tx1.setText(String.format("%d min, %d sec",
               TimeUnit.MILLISECONDS.toMinutes((long) startTime),
               TimeUnit.MILLISECONDS.toSeconds((long) startTime) -
               TimeUnit.MINUTES.toSeconds(TimeUnit.MILLISECONDS.toMinutes((long)
                  startTime)))
            );

            seekbar.setProgress((int)startTime);
            myHandler.postDelayed(UpdateSongTime,100);
            b2.setEnabled(true);
            b3.setEnabled(false);
         }
      });

      b2.setOnClickListener(new View.OnClickListener() {
         @Override
         public void onClick(View v) {
            Toast.makeText(getApplicationContext(), "Pausing
               sound",Toast.LENGTH_SHORT).show();
            mediaPlayer.pause();
            b2.setEnabled(false);
            b3.setEnabled(true);
         }
      });

      b1.setOnClickListener(new View.OnClickListener() {
         @Override
         public void onClick(View v) {
            int temp = (int)startTime;

            if((temp+forwardTime)<=finalTime){
               startTime = startTime + forwardTime;
               mediaPlayer.seekTo((int) startTime);
               Toast.makeText(getApplicationContext(),"You have Jumped forward 5
                  seconds",Toast.LENGTH_SHORT).show();
            }else{
               Toast.makeText(getApplicationContext(),"Cannot jump forward 5
                  seconds",Toast.LENGTH_SHORT).show();
            }
         }
      });

      b4.setOnClickListener(new View.OnClickListener() {
         @Override
         public void onClick(View v) {
            int temp = (int)startTime;

            if((temp-backwardTime)>0){
               startTime = startTime - backwardTime;
               mediaPlayer.seekTo((int) startTime);
               Toast.makeText(getApplicationContext(),"You have Jumped backward 5
                  seconds",Toast.LENGTH_SHORT).show();
            }else{
               Toast.makeText(getApplicationContext(),"Cannot jump backward 5
                  seconds",Toast.LENGTH_SHORT).show();
            }
         }
      });
   }

   private Runnable UpdateSongTime = new Runnable() {
      public void run() {
         startTime = mediaPlayer.getCurrentPosition();
         tx1.setText(String.format("%d min, %d sec",
            TimeUnit.MILLISECONDS.toMinutes((long) startTime),
            TimeUnit.MILLISECONDS.toSeconds((long) startTime) -
            TimeUnit.MINUTES.toSeconds(TimeUnit.MILLISECONDS.
            toMinutes((long) startTime)))
         );
         seekbar.setProgress((int)startTime);
         myHandler.postDelayed(this, 100);
      }
   };
}
以下是 res/layout/activity_main.xml 的修改内容。
在下面的代码中,abc表示 tutorialspoint.com 的标志
<?xml version="1.0" encoding="utf-8"?>
<RelativeLayout xmlns:android="http://schemas.android.com/apk/res/android"
   xmlns:tools="http://schemas.android.com/tools" android:layout_width="match_parent"
   android:layout_height="match_parent"
   android:paddingLeft="@dimen/activity_horizontal_margin"
   android:paddingRight="@dimen/activity_horizontal_margin"
   android:paddingTop="@dimen/activity_vertical_margin"
   android:paddingBottom="@dimen/activity_vertical_margin" tools:context=".MainActivity">

   <TextView android:text="Music Palyer" android:layout_width="wrap_content"
      android:layout_height="wrap_content"
      android:id="@+id/textview"
      android:textSize="35dp"
      android:layout_alignParentTop="true"
      android:layout_centerHorizontal="true" />

   <TextView
      android:layout_width="wrap_content"
      android:layout_height="wrap_content"
      android:text="Tutorials point"
      android:id="@+id/textView"
      android:layout_below="@+id/textview"
      android:layout_centerHorizontal="true"
      android:textColor="#ff7aff24"
      android:textSize="35dp" />

   <ImageView
      android:layout_width="wrap_content"
      android:layout_height="wrap_content"
      android:id="@+id/imageView"
      android:layout_below="@+id/textView"
      android:layout_centerHorizontal="true"
      android:src="@drawable/abc"/>

   <Button
      android:layout_width="wrap_content"
      android:layout_height="wrap_content"
      android:text="@string/forward"
      android:id="@+id/button"
      android:layout_alignParentBottom="true"
      android:layout_alignParentLeft="true"
      android:layout_alignParentStart="true" />

   <Button
      android:layout_width="wrap_content"
      android:layout_height="wrap_content"
      android:text="@string/pause"
      android:id="@+id/button2"
      android:layout_alignParentBottom="true"
      android:layout_alignLeft="@+id/imageView"
      android:layout_alignStart="@+id/imageView" />

   <Button
      android:layout_width="wrap_content"
      android:layout_height="wrap_content"
      android:text="@string/back"
      android:id="@+id/button3"
      android:layout_alignTop="@+id/button2"
      android:layout_toRightOf="@+id/button2"
      android:layout_toEndOf="@+id/button2" />

   <Button
      android:layout_width="wrap_content"
      android:layout_height="wrap_content"
      android:text="@string/rewind"
      android:id="@+id/button4"
      android:layout_alignTop="@+id/button3"
      android:layout_toRightOf="@+id/button3"
      android:layout_toEndOf="@+id/button3" />

   <SeekBar
      android:layout_width="wrap_content"
      android:layout_height="wrap_content"
      android:id="@+id/seekBar"
      android:layout_alignLeft="@+id/textview"
      android:layout_alignStart="@+id/textview"
      android:layout_alignRight="@+id/textview"
      android:layout_alignEnd="@+id/textview"
      android:layout_above="@+id/button" />

   <TextView
      android:layout_width="wrap_content"
      android:layout_height="wrap_content"
      android:textAppearance="?android:attr/textAppearanceSmall"
      android:text="Small Text"
      android:id="@+id/textView2"
      android:layout_above="@+id/seekBar"
      android:layout_toLeftOf="@+id/textView"
      android:layout_toStartOf="@+id/textView" />

   <TextView
      android:layout_width="wrap_content"
      android:layout_height="wrap_content"
      android:textAppearance="?android:attr/textAppearanceSmall"
      android:text="Small Text"
      android:id="@+id/textView3"
      android:layout_above="@+id/seekBar"
      android:layout_alignRight="@+id/button4"
      android:layout_alignEnd="@+id/button4" />

   <TextView
      android:layout_width="wrap_content"
      android:layout_height="wrap_content"
      android:textAppearance="?android:attr/textAppearanceMedium"
      android:text="Medium Text"
      android:id="@+id/textView4"
      android:layout_alignBaseline="@+id/textView2"
      android:layout_alignBottom="@+id/textView2"
      android:layout_centerHorizontal="true" />

</RelativeLayout>
以下是 res/values/string.xml 的内容。
<resources>
   <string name="app_name">My Application</string>
   <string name="back"><![CDATA[<]]></string>
   <string name="rewind"><![CDATA[<<]]></string>
   <string name="forward"><![CDATA[>>]]></string>
   <string name="pause">||</string>
</resources>
以下是 AndroidManifest.xml 文件的内容。
<?xml version="1.0" encoding="utf-8"?>
<manifest xmlns:android="http://schemas.android.com/apk/res/android"
   package="com.example.sairamkrishna.myapplication" >

   <application
      android:allowBackup="true"
      android:icon="@drawable/ic_launcher"
      android:label="@string/app_name"
      android:theme="@style/AppTheme" >

      <activity
         android:name="com.example.sairamkrishna.myapplication.MainActivity"
         android:label="@string/app_name" >

         <intent-filter>
            <action android:name="android.intent.action.MAIN" />
            <category android:name="android.intent.category.LAUNCHER" />
         </intent-filter>

      </activity>

   </application>
</manifest>
让我们尝试运行您的应用程序。 我假设您已将实际的 Android 移动设备与您的计算机连接起来。 要从 Eclipse 运行应用程序,请打开项目的活动文件之一,然后单击工具栏中的 Run  图标。在启动您的应用程序之前,Android Studio 将显示以下屏幕
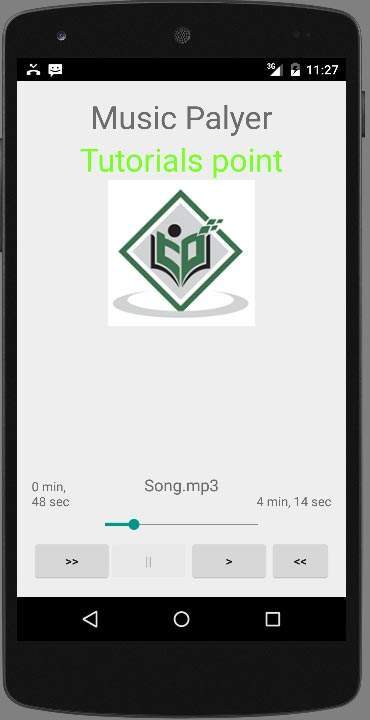
默认情况下,您会看到暂停按钮被禁用。 现在按下播放按钮,它将变为禁用,暂停按钮变为启用。 如下图所示 −
直到现在,音乐一直在播放。 现在按下暂停按钮并查看暂停通知。 如下所示 −

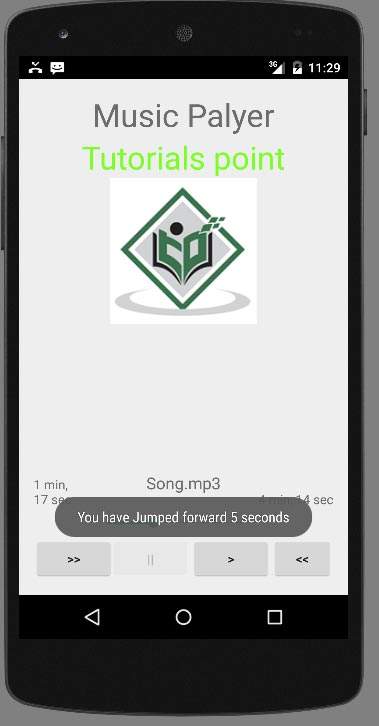
现在,当您再次按下播放按钮时,歌曲不会从头开始播放,而是从暂停的地方开始播放。 现在按快进或快退按钮将歌曲向前或向后跳 5 秒。 歌曲无法向前跳的时候到了。 此时,将出现类似这样的通知 −
当您在手机中执行其他任务时,您的音乐将继续在后台播放。 为了停止它,您必须从后台活动中退出此应用程序。
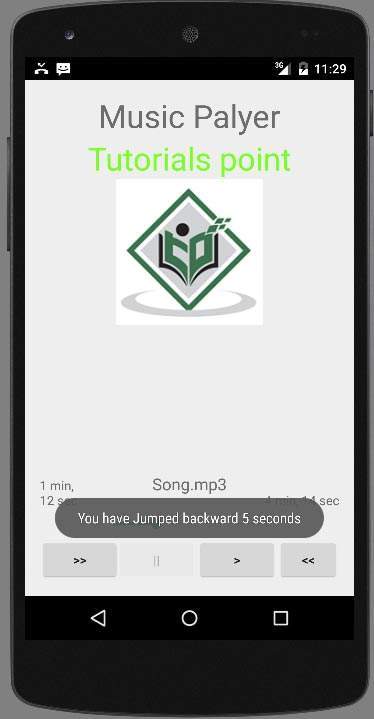
上图显示了当您选择快退按钮时。