iOS - 第一个 iPhone 应用程序
创建第一个应用程序
现在我们要创建一个简单的单视图应用程序(一个空白应用程序),它将在 iOS 模拟器上运行。
步骤如下。
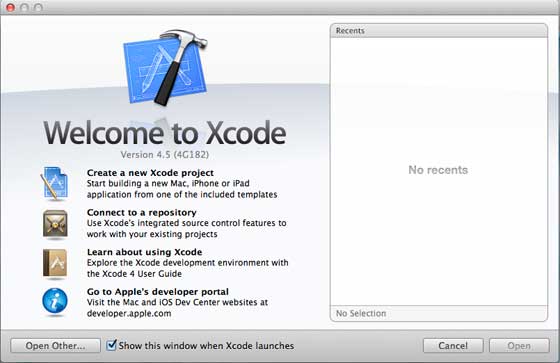
步骤 1 − 打开 Xcode 并选择Create a new Xcode project目。
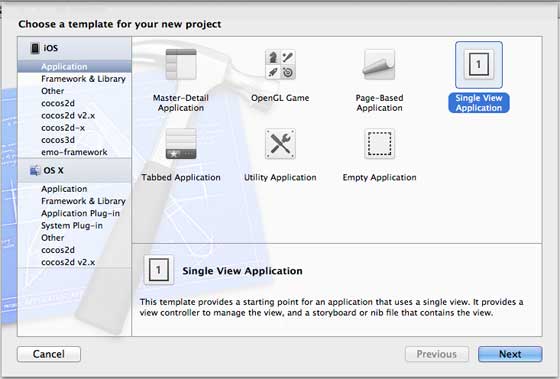
步骤 2 − 选择 Single View Application。
步骤 3 − 输入产品名称,即应用程序名称、组织名称,然后是公司标识符。
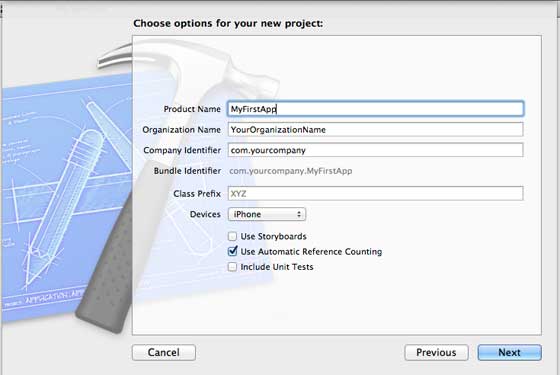
步骤 4 − 确保选择 Use Automatic Reference Counting,以便在超出范围时自动释放分配的资源。 点击下一步。
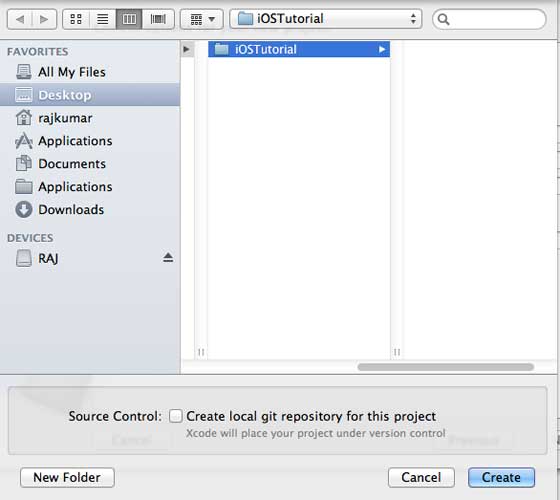
步骤 5 − 选择项目的目录并选择创建。
步骤 6 − 您将看到如下屏幕 −
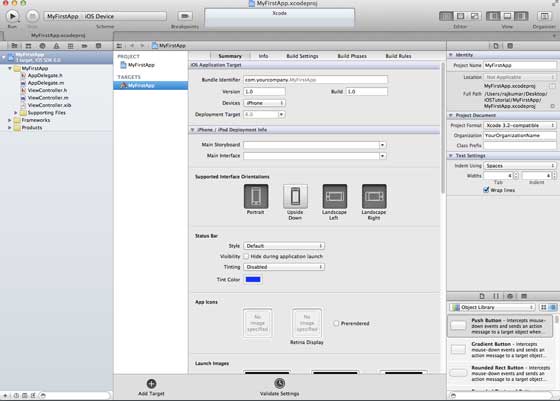
在上面的屏幕中,您将能够选择支持的方向、构建和发布设置。 有一个现场部署目标,我们要支持的设备版本,让我们选择 4.3,这是现在允许的最低部署目标。 目前,这些不是必需的,让我们专注于运行应用程序。
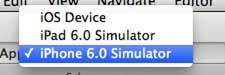
步骤 7 − 现在,在运行按钮附近的下拉菜单中选择 iPhone 模拟器,然后选择运行。
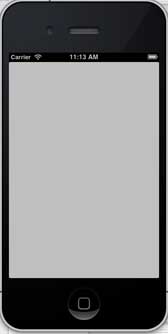
步骤 8 − 而已; 您已成功运行您的第一个应用程序。 您将获得如下输出 −
现在让我们更改背景颜色,以开始使用界面构建器。 选择 ViewController.xib。 选择右侧的背景选项,更改颜色并运行。
在上述项目中,默认情况下,部署目标已设置为 iOS 6.0,并且将启用自动布局。 为了确保我们的应用程序在 iOS 4.3 及更高版本的设备上运行,我们已经在创建此应用程序时修改了部署目标,但我们没有禁用自动布局。
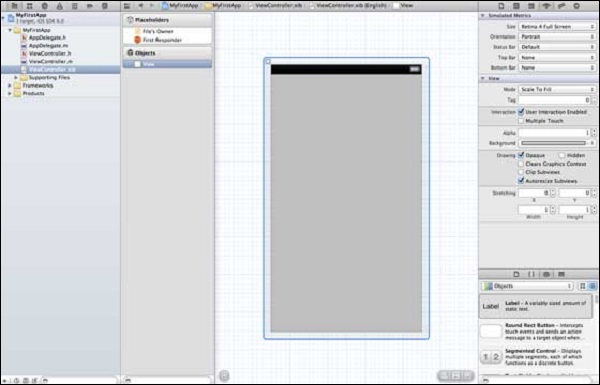
要禁用 auto-layout 自动布局,我们需要在每个 nib 的文件检查器中取消选中自动布局复选框,即 xib 文件。 下图给出了 Xcode 项目 IDE 的各个部分(Courtesy: Apple Xcode 4 用户文档)。
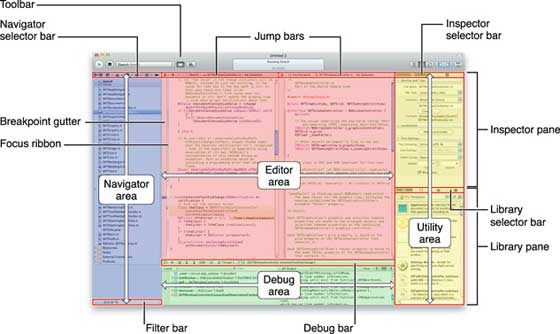
如上所示,在检查器选择栏中可以找到文件检查器,并且可以在此处取消选中自动布局。 当您只想针对 iOS 6 设备时,可以使用自动布局。此外,如果您将部署目标提高到 iOS 6,您将能够使用许多新功能,例如 passbook。现在,让我们坚持使用 iOS 4.3 作为部署目标。
第一个 iOS 应用程序代码
您会发现为您的应用程序生成的五个不同文件。 它们列出如下 −
- AppDelegate.h
- AppDelegate.m
- ViewController.h
- ViewController.m
- ViewController.xib
AppDelegate.h
实例
// Header File that provides all UI related items.
#import <UIKit/UIKit.h>

// Forward declaration (Used when class will be defined /imported in future)
@class ViewController;

// Interface for Appdelegate
@interface AppDelegate : UIResponder <UIApplicationDelegate>

// Property window
@property (strong, nonatomic) UIWindow *window;

// Property Viewcontroller

@property (strong, nonatomic) ViewController *viewController;
//this marks end of interface
@end
代码中的重要项目 −
AppDelegate 继承自处理 iOS 事件的 UIResponder。
实现 UIApplicationDelegate 的委托方法,提供启动完成、即将终止等关键应用事件。
UIWindow 对象用于管理和协调 iOS 设备屏幕上的各种视图。 它就像加载所有其他视图的基础视图。 通常一个应用程序只有一个窗口。
UIViewController 来处理屏幕流。
AppDelegate.m
实例
// Imports the class Appdelegate's interface
import "AppDelegate.h"

// Imports the viewcontroller to be loaded
#import "ViewController.h"

// Class definition starts here
@implementation AppDelegate


// Method to intimate us that the application launched successfully
- (BOOL)application:(UIApplication *)application
didFinishLaunchingWithOptions:(NSDictionary *)launchOptions {
   self.window = [[UIWindow alloc] initWithFrame:[[UIScreen mainScreen] bounds]];

   // Override point for customization after application launch.
   self.viewController = [[ViewController alloc]
   initWithNibName:@"ViewController" bundle:nil];
   self.window.rootViewController = self.viewController;
   [self.window makeKeyAndVisible];
   return YES;
}

- (void)applicationWillResignActive:(UIApplication *)application {
   /* Use this method to release shared resources, save user data,
   invalidate timers, and store enough application state information
   to restore your application to its current state in case it is
   terminated later. If your application supports background
   execution, this method is called instead of
   applicationWillTerminate: when the user quits.*/
}

- (void)applicationWillEnterForeground:(UIApplication *)application {
   /* Called as part of the transition from the background to the
   inactive state. Here you can undo many of the changes made on
   entering the background.*/
}

- (void)applicationDidBecomeActive:(UIApplication *)application {
   /* Restart any tasks that were paused (or not yet started) while
   the application was inactive. If the application was previously in
   the background, optionally refresh the user interface.*/
}

- (void)applicationWillTerminate:(UIApplication *)application {
   /* Called when the application is about to terminate. Save data if
   appropriate. See also applicationDidEnterBackground:. */
}

- (void)applicationWillTerminate:(UIApplication *)application {
   /* Called when the application is about to terminate. Save data if appropriate.
   See also applicationDidEnterBackground:. */
}
@end
代码中的重要项目 −
UIApplication 委托在此处定义。 上面定义的所有方法都是 UI 应用程序委托,并且不包含用户定义的方法。
UIWindow 对象被分配来保存分配的应用程序。
UIViewController 被分配为窗口的初始视图控制器。
为了使窗口可见,调用 makeKeyAndVisible 方法。
ViewController.h
实例
#import <UIKit/UIKit.h>

// Interface for class ViewController
@interface ViewController : UIViewController

@end
代码中的重要项目 −
ViewController 类继承了 UIViewController,它为 iOS 应用程序提供了基本的视图管理模型。
ViewController.m
实例
#import "ViewController.h"

// Category, an extension of ViewController class
@interface ViewController ()

@end

@implementation ViewController

- (void)viewDidLoad {
   [super viewDidLoad];
   // Do any additional setup after loading the view, typically from a nib.
}

- (void)didReceiveMemoryWarning {
   [super didReceiveMemoryWarning];
   // Dispose of any resources that can be recreated.
}
@end
代码中的重要项目 −
这里实现的两个方法是在基类 UIViewController 中定义的。
在视图加载后调用的 viewDidLoad 中进行初始设置。
在内存警告的情况下调用 didReceiveMemoryWarning 方法。